1) Download VirtualBox
2) Download a pre-compiled compressed ISO of Ubuntu 18 for VirtualBox OSBoxes.org and follow the tutorial at this site, preferably the 64-bit. Note the screenshots there are for VirtualBox 5.x. Installing the Guest Additions is highly recommended. Here is a nice, quick tutorial.
3) You will need to download a program to open the .7z file, for Windows see 7-Zip.org and for Mac download and install Keka. Both are free.
-On a Mac, using VirtualBox 6, if your "guest" Ubuntu appears very small, you need to go to the VirtualBox Preferences » Display » Scale Factor = 200%. If you created the Ubuntu VM with 6.0.0, you need to shut down the VM, go to the VM Settings » Display » Screen » Graphics Controller = VBoxVGA. An explanation is here.
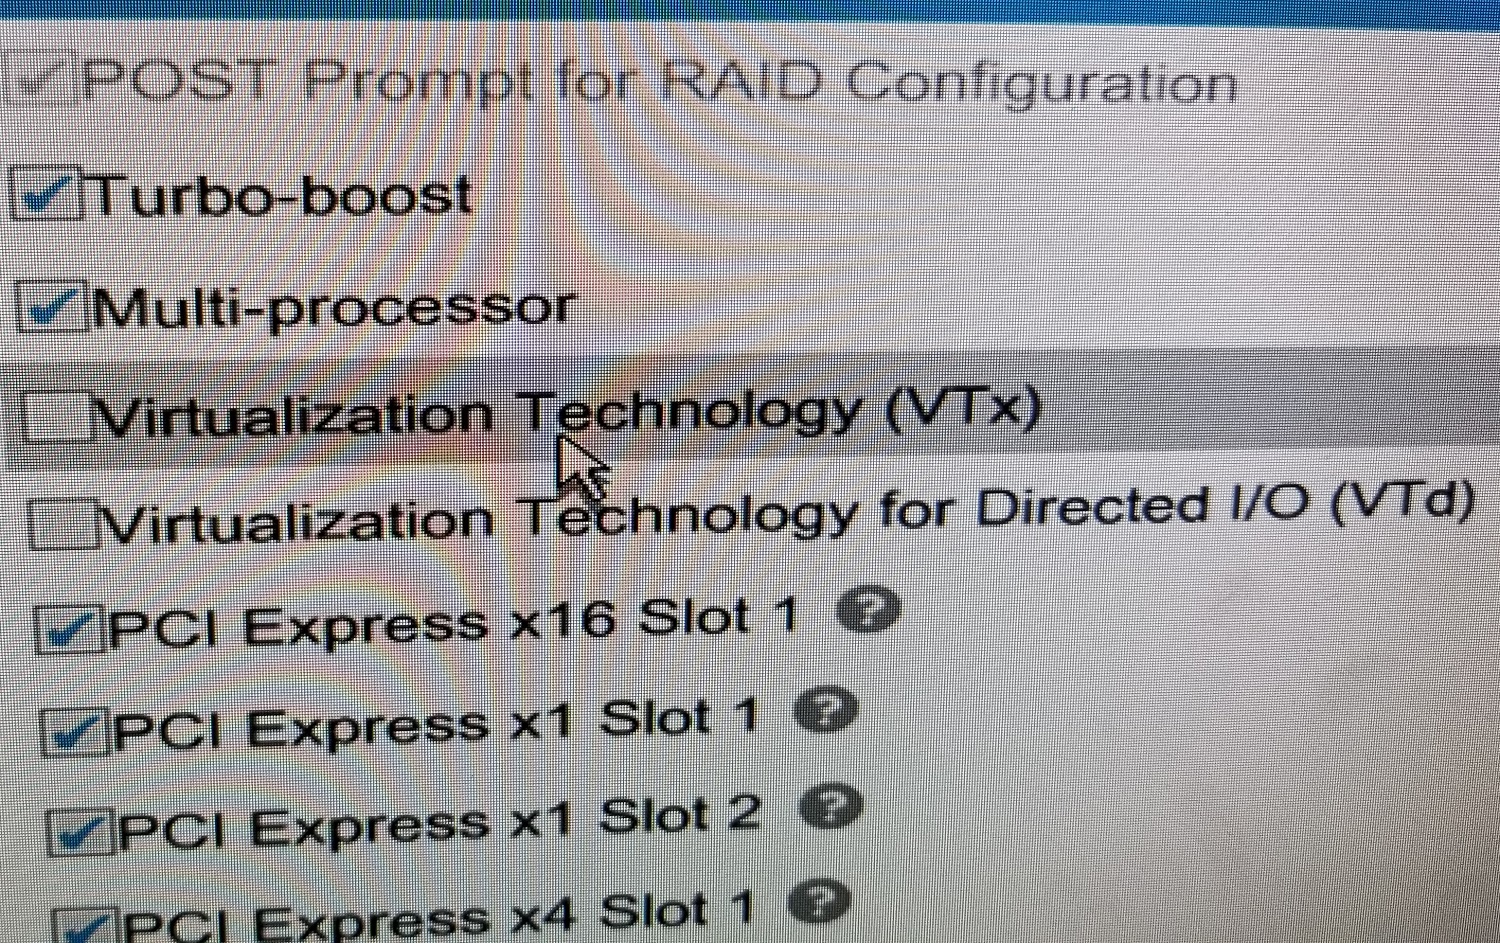
-If in VirtualBox if after starting Ubuntu you get a blinking cursor or you only see 32-bit option in VirtualBox see the tips here, and make sure Virtualization Technology and vT-d are enabled in your BIOS. On a HP it looks like this
-If you are using an external USB adapter for WiFi, see the VirtualBox USB FAQs/tips here.
sudo apt-get update
systemctl start ssh
systemctl status ssh
sudo apt-get install ssh
systemctl status rsyslog
systemctl start rsyslog
slide 12:
ssh osboxes@10.0.2.15
ls –l ~/.ssh
slide 13:
ssh-keygen -lf /etc/ssh/ssh_host_ecdsa_key.pub
ssh-keygen -lf ~/.ssh/known_hosts
slide 14:
ssh -o FingerPrintHash=sha256 -o VisualHostKey=yes 10.0.2.15
ssh-keygen -lv -E sha256 -f ~/.ssh/known_hosts
slide 15:
ssh-keygen -t ed25519 -b 16384
ssh-copy-id osboxes@10.0.2.15
ssh osboxes@10.0.2.15
slide 16:
sudo nano /etc/ssh/sshd_config
sudo systemctl restart ssh
ssh test@10.0.2.15
ssh -Q cipher       # List supported ciphers
ssh -Q mac          # List supported MACs
ssh -Q key          # List supported public key types
ssh -Q kex          # List supported key exchange algorithms
slide 21:
sudo apt-get install fail2ban sudo nano /etc/fail2ban/jail.localslide 22:
[DEFAULT] [ssh] enabled = true port = ssh filter = sshd logpath = /var/log/auth.log maxretry = 3
sudo systemctl restart fail2ban
tail -n30 -f /var/log/fail2ban.log
cat /proc/sys/net/ipv4/ip_local_port_rangeslide 27:
ssh –p 2222 osboxes@localhostslide 28:
sudo tail –n10 –f /var/log/fail2ban.log
ssh –p 2222 root@localhost
slide 31:
mkdir ~/my-ca && cd ~/my-ca
ssh-keygen -C CA -f ca
sudo cp ca.pub /etc/ssh/
sudo nano /etc/ssh/sshd_config
TrustedUserCAKeys /etc/ssh/ca.pub
sudo systemctl restart ssh
slide 32: ***Note that on older Macs "ecdsa" is not supported, so you can just run ssh-keygen without any options, and substitute id_rsa.pub for id_ecdsa.pub.***
ssh-keygen -t ecdsa
cd ~/.ssh
ls -lt
You should see id_ecdsa and id_ecdsa.pub which are your private key and public key, respectively. We will secure FTP (upload) the public key to Ubuntu. From your desktop "client", i.e., Terminal in a Mac or Ubuntu on Windows run these commands:
sftp -P 2222 osboxes@localhost
ls -l
pwd
cd my-ca
put id_ecdsa.pub
ls -l
exit
slide 33:
ssh-keygen -s ca -I guesthost -n osboxes -V +1w -z 1 id_ecdsa.pubLet’s inspect the newly created certificate with this command:
ssh-keygen -Lf id_ecdsa-cert.pubslide 34:
sftp -P 2222 osboxes@localhost
ls -l
cd my-ca
ls -l
get id_ecdsa-cert.pub
ls -l
exit
Create a file that will prepend the port number and hostname and acts as a work around for an issue in Mac OS X.
nano ~/.ssh/config
host localhost
HostName localhost
Port 2222
User osboxes
Save changes and exit the file:
ctl o, press enter, ctl xNow try to ssh in:
ssh localhost
exit
Try with a non-existing user:
ssh test@localhostslide 35:
nano /etc/ssh/sshd_config
sudo systemctl restart ssh
tail –n30 –f /var/log/syslog
slide 36:
ssh -p 222 osboxes@10.0.2.15
nano ~/.ssh/config
Host 10.0.2.15 Port 222
ssh -p 2222 osboxes@localhost
slide 37:
ip addr
tail –n30 –f /var/log/fail2ban.log
ssh -p 222 10.0.2.15
sudo nano /etc/fail2ban/jail.local
ignoreip = 10.0.2.15
sudo systemctl restart fail2ban
ssh -p 222 osboxes@localhost
tail -n40 -f /var/log/fail2ban.log
slide 38:
sudo apt-get install sendmail sendmail-binThen add this new line to the end of the file, and change the username (the osboxes part) if you are not using osboxes:
sudo nano /etc/hosts 127.0.0.1 localhost localhost.localdomain osboxes
10.0.2.15 localhost localhost.localdomain osboxesCheck logs:
sudo systemctl enable sendmail sudo systemctl start sendmail
tail -n20 -f /var/log/mail.logCheck status:
systemctl status sendmailslide 39: Note ctl-k deletes the previous entries.
sudo nano /etc/fail2ban/jail.local
[DEFAULT]
destemail = CHANGEME@fordham.edu
sendername = Fail2Ban
mta = sendmail
banaction = iptables-multiport
action = %(action_mw)s
protocol = tcp

[ssh]
enabled  = true
port     = 22,222
filter   = sshd
logpath  = /var/log/auth.log
maxretry = 3
[recidive]
enabled  = true
filter   = recidive
logpath  = /var/log/fail2ban.log
action   = iptables-allports[name=recidive]
sendmail-whois-lines[name=recidive, logpath=/var/log/fail2ban.log]
bantime  = 604800  ; 1 week
findtime = 86400   ; 1 day maxretry = 5
sudo systemctl restart fail2ban
sudo systemctl status fail2ban
tail -n30 -f /var/log/fail2ban.log
If you do this outside Fordham's network, the email might not go out. Check the logs in /var/log/mail.log
tail -f -n30 /var/log/mail.logslide 41
ctl-c to quit
cd ~
sudo wget https://raw.githubusercontent.com/mitchellkrogza/fail2ban-useful-scripts/master/f2b-badips-to-hostsdeny.sh
sudo chmod 755 f2b-badips-to-hostsdeny.sh
sudo nano f2b-badips-to-hostsdeny.sh
Look for
_keyservice=and add
9f0f68f96dad4815715b22bd260eaa90bc3be9afType the following to run the script:
sudo ./f2b-badips-to-hostsdeny.sh(ignore the syntax error/invalid number of lines) The script populates the
/etc/hosts.denyfile -- view it!
more /etc/hosts.denyOptional, add it to cron so it updates every night, in this example at 10:55 PM, the next line assume ‘vi’ is used rather than ‘nano’: Type
crontab -e(press Enter), then press “i” (for insert) and add (replacing with your home directory):
55 22 * * * /home/osboxes/f2b-badips-to-hostsdeny.sh
:wq!will save and exit the file.